Deploying with Remix
Overview
Remix is one of the most commonly used development environments for smart contracts on Ethereum. Due to SCS Chain's compatibility with Ethereum, Remix can be used directly with the SCS Chain network. This tutorial will guide you through the process of deploying and creating Solidity-based smart contracts on SCS Chain using the Remix IDE.
Check Prerequisites
Before getting started, you will need the following:
- Installed and configured MetaMask to use your development node.
Getting Started with Remix
Now, you can launch Remix and get started. Select SOLIDITY under Featured Plugins on the main page to configure Remix for Solidity development. Then, navigate to the File Explorers.

You will need to create a new file to save your Solidity smart contract. Click the "+" button below File Explorers and enter the file name "MyToken.sol" in the pop-up window.
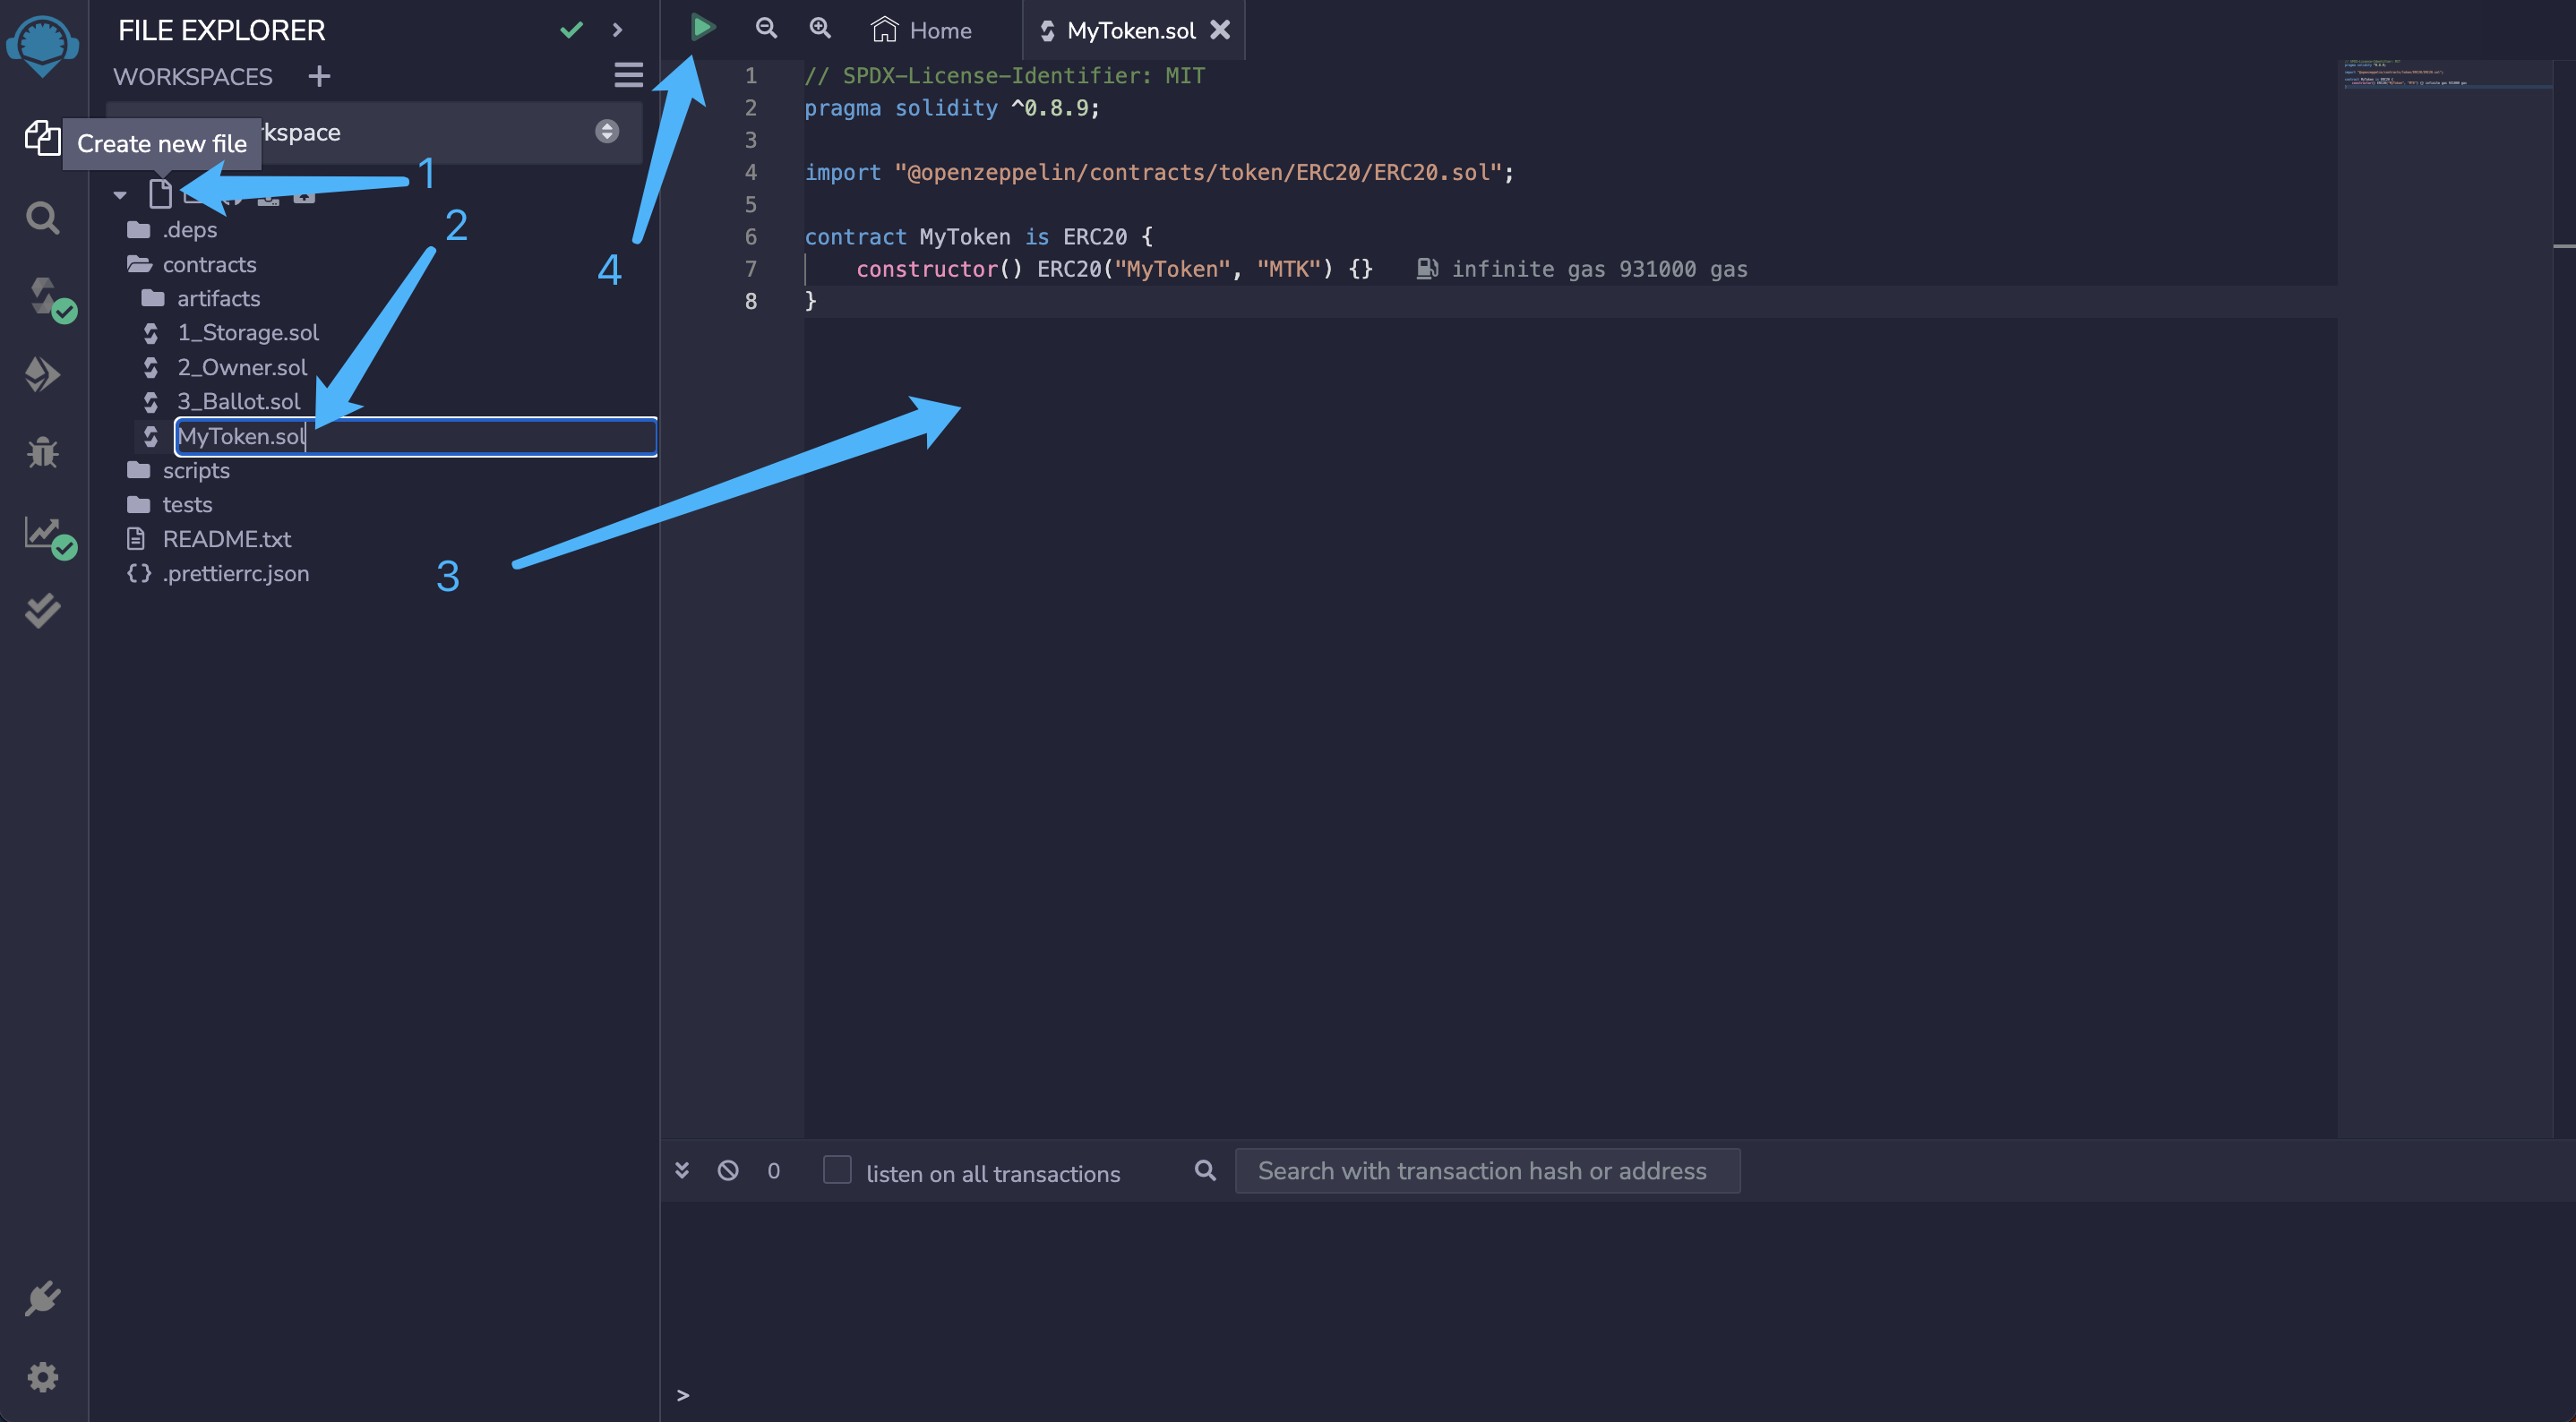
Next, paste the following smart contract into the editing box in the pop-up window:
// SPDX-License-Identifier: MIT
pragma solidity ^0.8.9;

import "@openzeppelin/contracts/token/ERC20/ERC20.sol";

contract MyToken is ERC20 {
    constructor() ERC20("MyToken", "MTK") {
        _mint(msg.sender, 100000000 * 10 ** decimals());
    }
}
This is a simplified version of an SRC-20 contract based on the latest OpenZeppelin SRC-20 template. The contract uses "MYTOK" as the symbol for the token and mints the initial tokens for the contract creator.
Next, navigate to the "Compile" tab in the side menu and click the "Compile MyToken.sol" button.
You will see that Remix downloads all the dependencies from OpenZeppelin and completes the contract compilation.
In MetaMask, click "Next" to authorize Remix to use your selected account.
Then, return to the Remix interface, and you will see that the account you want to use for deployment is already logged in via MetaMask.
Once you have verified everything, click "Deploy" to proceed.

Subsequently, MetaMask will prompt a pop-up asking you to confirm the transaction for deploying the contract.
Once you click "Confirm," the deployment will be completed, and you will see the transaction record in MetaMask. At the same time, the contract will appear under "Deployed Contracts" in Remix.
After successfully deploying the contract, you can interact with the smart contract through Remix.
Scroll down the page and find "MYTOKEN At." If you copy the contract address and paste it into the "balanceOf" field, you will see the total balance of the user's address. You can click the button next to the contract name and address to copy the contract address.

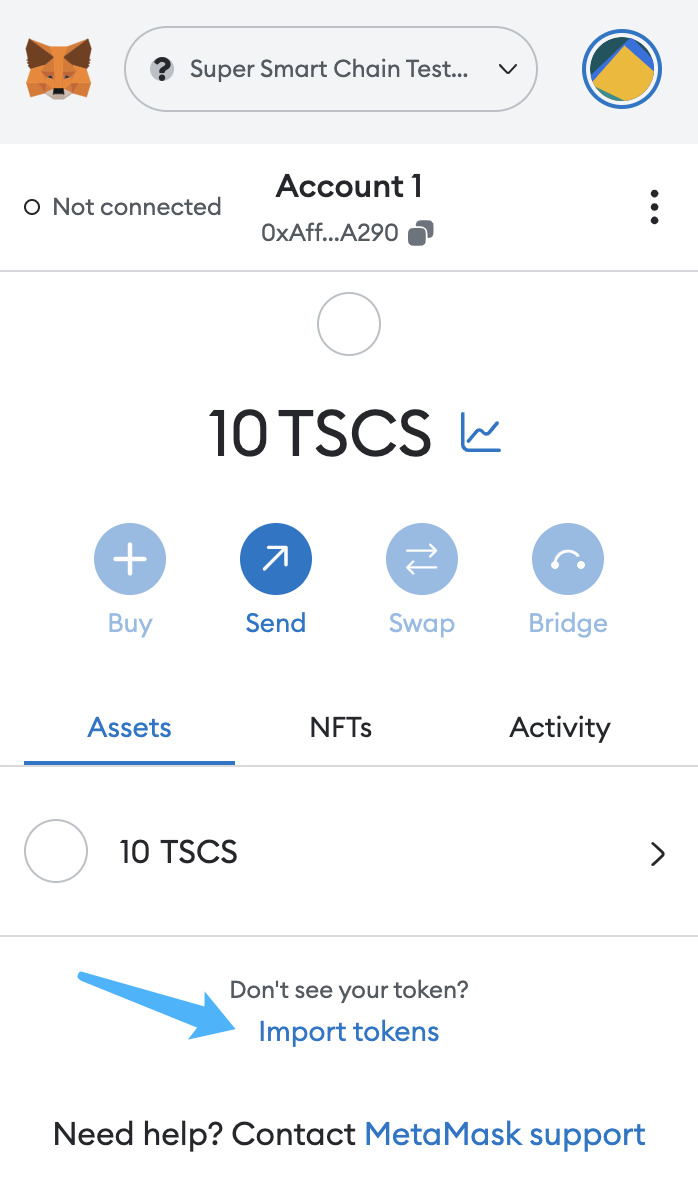
To interact with the deployed SRC-20 token using MetaMask
- Open MetaMask and ensure that you have copied the contract address from Remix.
- Go to the MetaMask interface and click on "Add Token," as shown in the screenshot below.
- Make sure you are using the MetaMask account that deployed the contract.